I have been looking for job for over a month now. I noticed that a lot of job application form asks for personal website/blog. So I decided to start blogging.
Github Pages is the easiest way for this as you don’t need any domain or hosting. All you need a github account. I am going to use Jekyll with Chirpy theme.
You don’t need Jekyll for running Github Pages but Jekyll is a powerful tool that helps you manage your content.
Lets roll
Step 1: Start GH repository
Create a new repository from the Chirpy Starter and name it GH_USERNAME.github.io. If your username is brayan then the repo would be brayan.github.io
Step 2: Clonning
Clone the repository
Step 3: Manage dependencies
From the root directory run bundle install to install the dependencies
Step 4: Running the site localy
Run following command to start the server
1
bundle exec jekyll serve
If you are using Ruby version 3.0.0 or higher, step 4 may fail. You may fix it by adding webrick to your dependencies by running
bundle add webrick.
You should be able to see some content by visiting http://localhost:4000.
Step 5: Update site configuration
Open _config.yml and update the configurations like language, title, tagline, description, github, twitter, social.
Step 6: Update sidebar image
Put an image under assets directory, i.e assets/img/avatar.jpg. Then reference the image in the _config.yml on the avatar key.
1
avatar: assets/img/avatar.jpg
An image with 300*300 size works best.
Step 7: Customize favicons
Follow the instructions of this post
Step 8: Deployment
If you are not on linux then run
bundle lock --add-platform x86_64-linux
- On Github create a new branch named
gh-pages. - Go to
Settingstab and from left sidebar go topages. - Update the source and hit
save.
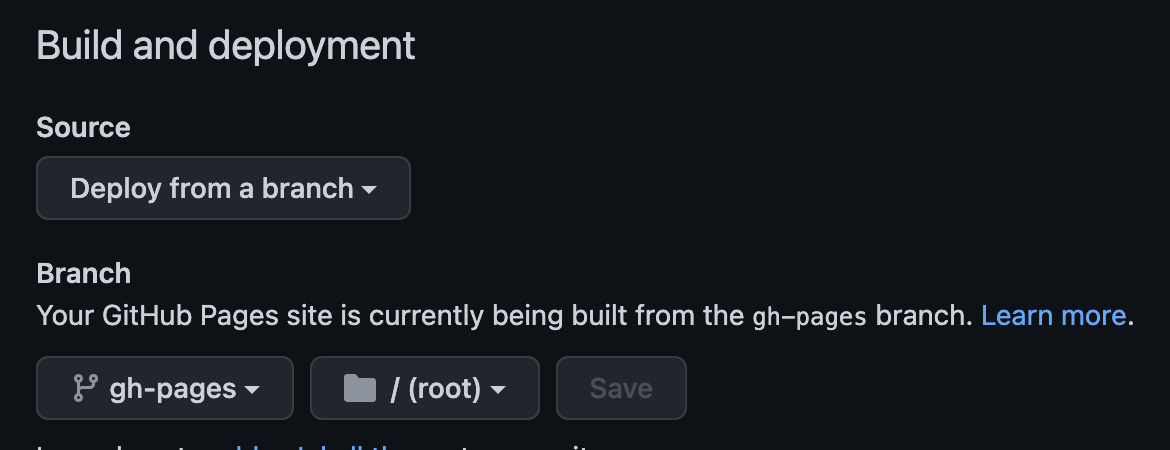 Screenshot
- commit and push your changes
- Visit
https://<username>.github.io/to see your live blog
It can take few minutes to see the laest change after every push